YubiKey for SSH, Login, 2FA, GPG and Git Signing
I've been using a YubiKey Neo for a bit over two years now, but its usage was limited to 2FA and U2F.
Last week, I received my new DELL XPS 15 9560, and since I am maintaining some high impact open source projects, I wanted the setup to be well secured.
In addition to that, I caught a bad flu, and that gave me enough excuses to waste time in figuring things out.
In this article, I'm going to describe what I did, and how you can reproduce my setup for your own safety as well as the one of people that trust you.
Yubi-WHAT?
In first place, you should know that I am absolutely not a security expert: all I did was following the online tutorials that I found. I also am not a cryptography expert, and I am constantly dissatisfied with how the crypto community reduces everything into a TLA, making even the simplest things impossible to understand for mere mortals.
First, let's clarify what a YubiKey is.

That thing is a YubiKey.
What does it do?
It's basically an USB key filled with crypto features. It also is (currently) impossible to make a physical copy of it, and it is not possible to extract information written to it.
It can:
- Generate HMAC hashes (kinda)
- Store GPG private keys
- Act as a keyboard that generates time-based passwords
- Generate 2FA time-based login codes
What do we need?
In order to follow this tutorial, you should have at least 2 (two) YubiKey Neo or equivalent devices. This means that you will have to spend approximately USD 100: these things are quite expensive. You absolutely need a backup key, because all these security measures may lock you out of your systems if you lose or damage one.
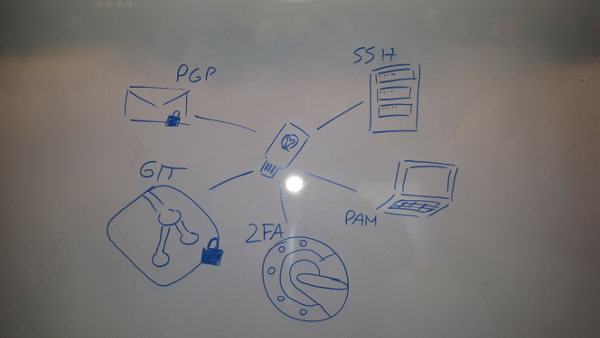
Our kickass setup will allow us to do a series of cool things related to daily development operations:
- Two Factor Authentication
- PAM Authentication (logging into your linux/mac PC)
- GPG mail and GIT commit signing/encrypting
- SSH Authentication

I am not going to describe the procedures in detail, but just link them and describe what we are doing, and why.
Setting up NFC 2FA
Simple NFC-based 2FA with authentication codes will be useful for most readers, even non-technical ones.
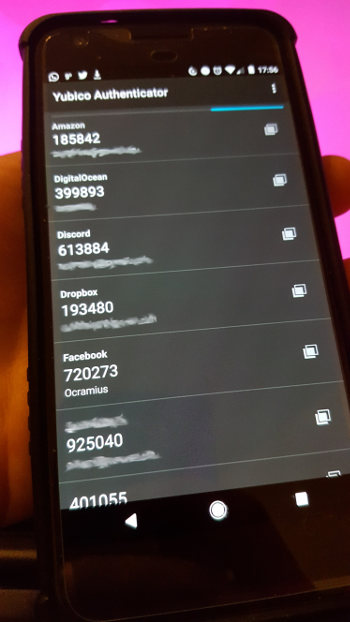
What we are doing is simply seed the YubiKey with Google Authenticator codes, except that we will use the Yubico Authenticator . This will only work for the "primary" key (the one we will likely bring with us at all times).
What we will have to do is basically:
- Install some Yubico utility to manage your Yubikey NEO
- Plug in your YubiKey and enable OTP and U2F
- Install the Yubico Authenticator
- Seed your Yubikey with the 2FA code provided by a compatible website
The setup steps are described in the official Yubico website .
Once the YubiKey is configured with at least one website that supports the "Google Authenticator" workflow, we should be able to:
- Open the Yubico Authenticator
- Tap the YubiKey against our phone's NFC sensor
- Use the generated authentication code

One very nice (and unclear, at first) advantage of having a YubiKey seeded with 2FA codes is that we can now generate 2FA codes on any phone, as long as we have our YubiKey with us.
I already had to remote-lock and remote-erase a phone in the past, and losing the Google Authenticator settings is not fun. If you handle your YubiKey with care, you shouldn't have that problem anymore.
Also, a YubiKey is water-proof: our 2017 phone probably isn't.
Setting up PAM authentication
CAUTION: this procedure
can potentially lead us to lose sudo
access from our account, as well as lock us out of our computer.
I take no responsibility: try it in a
VM
first, if you do not feel confident.
We want to make sure that we can log into our personal computer or workstation only when we are physically sitting at it. This means that we need the YubiKey must be plugged in for a password authentication to succeed.
Each login prompt, user password prompt or sudo
command should require both our account password and our YubiKey.
What we will have to do is basically:
- Install
libpam-yubico -
Enable some capabilities of our YubiKeys with
ykpersonalize -
Generate an initial challenge file for each YubiKey (you
bought at least 2, right?) with
ykpamcfg - Deploy the generated files in a root-only accessible path
-
IMPORTANT
start a
sudosession, and be ready to revert changes from there if things go wrong - Configure PAM to also expect a challenge response from a YubiKey (reads: a recognized YubiKey must be plugged in when trying to authenticate)
The steps to perform that are in the official Yubico tutorial .
If everything is done correctly, every prompt asking for our Linux/Mac account password should fail when no YubiKey is plugged in.
TIP: configure the libpam-yubico integration in debug mode, as we will often have a "WTH?" reaction when authentication isn't working. That may happen if there are communication errors with the YubiKey.
This setup has the advantage of locking out anyone trying to
bruteforce our password, as well as stopping potentially malicious
background programs from performing authentication or
sudo
commands while we aren't watching.
CAUTION: the point of this sort of setup is to guarantee that login can only happen with the physical person at the computer. If we want to go to the crapper, we lock lock computer, and bring our YubiKey with us.
Setting up GPG
This is probably the messiest part of the setup, as a lot of CLI tool usage is required.
Each YubiKey has the ability to store 3 separate keys for signing, encrypting and authenticating.
We will therefore create a series of GPG keys:
- A GPG master key (if we don't already have a GPG key)
-
A sub-key for signing (marked
[S]in the gpg interactive console) -
A sub-key for encrypting (marked
[E]in the gpg interactive console) -
A sub-key for authenticating (marked
[A]in the gpg interactive console) - Generate these 3 sub-keys for each YubiKey we have (3 keys per YubiKey)
CAUTION: as far as I know,
the YubiKey Neo only supports RSA keys up to 2048 long.
Do not use 4096 for the sub-key length unless we know
that the key type supports it.
After that, we will move the private keys to the YubiKeys
with the gpg keytocard command.
CAUTION: the
keytocard command is destructive. Once we moved
a private key to a YubiKey, it is removed from our local
machine, and it cannot be recovered. Be sure to only move
the correct sub-keys.
NOTE: being unable to recover the private sub-key is precisely the point of using a YubiKey: nobody can steal or misuse that keys, no malicious program can copy it, plus we can use it from any workstation.
Also, we will need to set a
PIN
and an
admin PIN.
These defaults for these two are respectively
123456
and
12345678.
The
PIN
will be needed each time we plug in we YubiKey to use
any of the private keys stored in it.
CAUTION:
we only have
3
attempts for entering our PIN. Should we fail all
attempts, then the YubiKey will be locked, and we
will have to move new GPG sub-keys to it before being
able to use it again. This prevents
bruteforcing after physical theft.
After our gpg sub-keys and PINs are written to the YubiKeys, let's make a couple of secure backups of our master gpg secret key. Then delete it from the computer Keep just the public key.
The master private gpg key should only be used to generate new sub-keys, if needed, or to revoke them, if we lose one or more of our physical devices.
We should now be able to:
- Sign messages with the signing key stored in our YubiKey (only if plugged in) and its PIN
- Verify those messages with the master public key
- Encrypt messages with the master public key
- Decrypt messages with the encryption key stored in the YubiKey (only if plugged in) and its PIN
The exact procedure to achieve all this is described in detail (with console output and examples) at drduh/YubiKey-Guide .
GIT commit signing
Now that we can sign messages using the GPG key stored in our YubiKey, usage with GIT becomes trivial:
git config --global user.signingkey=<yubikey-signing-sub-key-id>
We will now need to plug in our YubiKey and enter our PIN when signing a tag:
git tag -s this-is-a-signed-tag -m "foo"
Nobody can release software on our behalf without physical access to our YubiKey, as well as our YubiKey PIN.
Signing/Encrypting email messages
In order to sign/encrypt emails, we will need to install Mozilla Thunderbird and Enigmail .
The setup will crash a few times. I suggest going through the "advanced" settings, then actually selecting a signing/encryption key when trying to send a signed/encrypted message. Enigmail expects the key to be a file or similar, but this approach will allow us to just give it the private GPG key identifier.
Sending mails is still a bit buggy: Thunderbird will ask for the pin 3 times, as if it failed to authenticate, but the third attempt will actually succeed. This behavior will be present in a number of prompts, not just within Thunderbird.
! Nobody can read our encrypted emails, unless the YubiKey is plugged in. If our laptop is stolen, these secrets will be protected.
SSH authentication
There is one GPG key that we didn't use yet: the authentication one.
There is a (relatively) recent functionality of
gpg-agent
that allows it to behave as an
ssh-agent.
To make that work, we will simply kill all existing SSH and GPG agents:
sudo killall gpg-agent
sudo killall ssh-agent
# note: eval is used because the produced STDOUT is a bunch of ENV settings
eval $( gpg-agent --daemon --enable-ssh-support )
Once we've done that, let's try running:
ssh-add -L
Assuming we don't have any local SSH keys, the output should be something like:
ocramius@ocramius-XPS-15-9560:~$ ssh-add -L
The agent has no identities.
If we plug in our YubiKey and try again, the output will be:
ocramius@ocramius-XPS-15-9560:~$ ssh-add -L
ssh-rsa AAAAB3NzaC ... pdqtlwX6m1 cardno:000123457915
MAGIC! gpg-agent is exposing the public GPG key as
an SSH key.
If we upload this public key to a server, and then try logging in with the YubiKey plugged in, we will be asked for the YubiKey PIN, and will then just be able to log in as usual.
Nobody can log into our remote servers without having the physical key device.
We can log into our remote servers from any computer that can run gpg-agent. Just always bring our YubiKey with ourselves.
CAUTION: Each YubiKey with an authentication gpg sub-key will produce a different public SSH key: we will need to seed our server with all the SSH public keys.
TIP: consider using the YubiKey identifier (written on the back of the device) as the comment for the public SSH key, before storing it.
Steps to set up gpg-agent for SSH authentication
are also detailed in
drduh/YubiKey-Guide
.
Custom SSH keys are no longer needed: our GPG keys cover most usage scenarios.
Conclusion
We now have at least 2 physical devices that give us access to very critical parts of our infrastructure, messaging, release systems and computers in general.
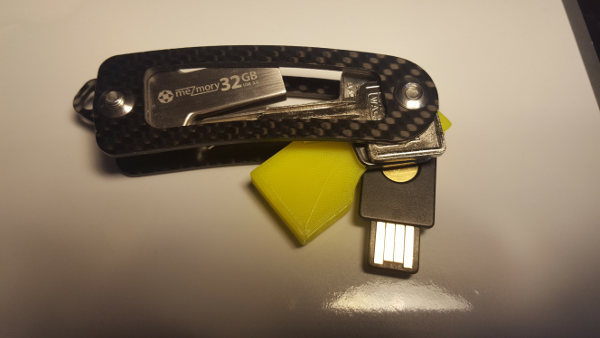
At this point, I suggest keeping one always with ourselves, and treating it with extreme care. I made a custom 3d-printed case for my YubiKey , and then put it all together in my physical keychain:

The backup key is to be kept in a secure location: while theft isn't a big threat with YubiKeys, getting locked out of all our systems is a problem. Make sure that you can always either recover a YubiKey or the master GPG key.
